juggling.tv
the online depository for juggling videos

Can Opener - Literally flipping your lid!
Reach over your shoulder and head, and hold the hat in an inverted pinch grip
Flick the wrist upwards and release the hat, which will execute a perfect single spin (honest). Coat-peg catch above your head.
Minus five style points if you have to look...
Plus 10 points if you can catch the hat on your head blind, and without the coat-peg grip.
From the TricksWithHats archive
00:09
1730
0
04-12-2015
![]()
![]()
![]()
![]()
![]() [0]
[0]
This trick is similar to the coatpeg drop but instead of dropping the hat and catching it behind your back, you catch it on your elbow.
Hold the hat in your right hand, and throw it up to a coatpeg catch in your left hand. Let go of the hat, and bend your left arm at the elbow, pointing your elbow upwards. Catch the hat on your elbow. To complete the move, straighten your arm and the hat will fall. The catch is similar to that in the wipe up
00:05
1817
0
04-12-2015
![]()
![]()
![]()
![]()
![]() [0]
[0]
At some point, your hat will end up on the floor and you'll want it back in your hand. You could just bend down and pick it up (boring!), use a normal foot to head (less boring, but relatively easy) or you could use this little move... (Far more studly way to kick a hat :-)
Place the hat on the floor, to your left, crown downwards and the opening tilting slightly towards you.
Point your right toe, and bring it behind your left leg. Place your right toe into the opening of the hat, and give it a quick upwards flick. With luck (and practice :-) you can make the hat jump up into your left hand.
Top tip: If the hat isn't quite in the right position, you can use your right foot to move it around a bit before kicking.
Bonus points: Do it without falling over about 20 times whilst filming the damn clip for your website...
00:04
1651
0
04-12-2015
![]()
![]()
![]()
![]()
![]() [0]
[0]

Tumble - Tumble the hat over the back of the hand
Hold the hat crown up in a outside grip. Swing the hat inwards and let go so it can roll up past the thumb onto the back of the wrist. While the hat is above the hand keep the wrist bent so the fingers are pointing outwards and lift the fingers as high as you can. The fingers will touch the inside of the crown and allow you to catch the hat in a inside grip.
To repeat the trick throw a half spin and catch the hat back in a outside grip or do a Reverse Tumble.
00:06
1869
0
04-12-2015
![]()
![]()
![]()
![]()
![]() [0]
[0]

Twiddled Big Circles - A trickier but nicer version of Big Circles
Big Circles is a big, visual trick, but the grip change can be slightly ungainly. The twiddle that this trick adds gives a similar effect but has a smoother, if slightly more difficult, change.
Mike and LP disagree on the best way to do this - LP's way, shown in the video clip above, is to do a finger twiddle, as described in the Forward Twiddle when the hat is at the top of the circle. Mike uses a Thumb Spin to adjust the grip.
Try both and decide which feels more comfortable to you, there's little point getting both smooth as they look identical to anyone except a hat manipulation geek, and there aren't many of them in the world!
From the TricksWithHats archive
00:05
1773
0
15-03-2015
![]()
![]()
![]()
![]()
![]() [0]
[0]

This is a combination of parts of two other tricks, so it would probably help to learn them first. They are the Arm Roll and the Wipe Up
Start with the hat on your head. With the right arm, do the first part of a wipe up, just to the point where the hat comes off your head. However, instead of carrying it out to the side, push the hat back on your head so that the bottom of the brim comes into contact with your shoulder blades.
Use your upper arm to push the hat off and to the left, so that it can roll down your arm as though you were doing an Arm Roll, catching it in you hand as you do so
One variation that Mike is fond of, is to grip the front part of the crown with the crook of the elbow. Mike claims this gives him more options, and more control over where the hat goes. Try it, it may work for you too!
00:03
1989
0
15-03-2015
![]()
![]()
![]()
![]()
![]() [0]
[0]

Tips and pointers welcome! I have only been doing two for a month and need all the help I can get!
00:19
1785
0
18-08-2014
![]()
![]()
![]()
![]()
![]() [0]
[0]
I find good point of veiw at my home !
03:12
2188
0
28-07-2011
![]()
![]()
![]()
![]()
![]() [1]
[1]
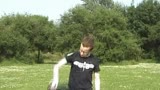
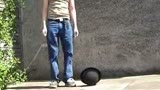
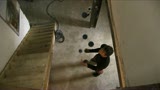
Viewpoints is a video experiment for a future project I'm starting to work on.
The idea is to play around with the camera position and the playback speed while trying to utilise the music track to enhance the visuals.
This video is just a rough experiment. It's not filmed in a nice location, I'm wearing my day to day clothes and everything was filmed without having any clear idea of how it would be used.
02:55
2102
1
19-12-2012
![]()
![]()
![]()
![]()
![]() [4]
[4]

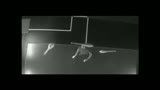
A new pattern created using Aidan notation. The manipulators in this pattern are dependent, as clubs are taken by one manipulator and replaced by the other.
4 count static Y base, with B at the back of the Y, D in the middle of the Y, A on the left of the Y (from the point of view of D and B) and C on the right. Aiden notation for the pattern:
A ps|ss|ps|ss|ps|ss
B ps|ss|ps|ss|ps|ss
C ps|ss|ps|ss|ps|ss
D ps|ss|ps|ss|ps|ss
M1 cD|--|sA|iA|cA|--
M2 sC|iC|cD|iD|cB|iB
Starting:
M1 starts back to back with D facing B
M2 stands in front of C facing C
We start with a ps and then the manipulators begin on ss. The manipulators start on the last instruction at ss as it is written above (M1 --, M2 iB)
When M1 reaches the end of the instructions, M1 becomes M2 (having reached the physical location of M2 at the start of the M2 instructions). Similarly M2 becomes M1
00:50
2874
0
29-07-2013
![]()
![]()
![]()
![]()
![]() [0]
[0]

Graphic poi from A Technologies. www.apixeltoys.com/us
48 LED diodes (24 on each side)
Rechargeable Lithium battery (2600 mAh)
Charging through mini USB port or with our Charger
Charger included in the packaging
Battery staying power approx. one hour and a half -- up to 2 hours
Uploading of images through mini USB port
The images will be uploaded through our software -- max. 256 images at one time.
The editing of images and texts can be made in Photoshop, Gimp or any other software for graphic design.
Timing of images and music is precisely set by the music Timeline
The body of the tube is made of break resistant polycarbonate
Hi level of the POV ( "Point Of View")
01:33
3682
0
14-01-2013
![]()
![]()
![]()
![]()
![]() [0]
[0]